Overview
This guide will walk you through the complete process of setting up your AI assistant, from initial creation to advanced configuration. Whether you’re building a customer support bot, sales assistant, or internal knowledge base, this guide covers everything you need to know.Creating Your Assistant
Step 1: Initial Setup
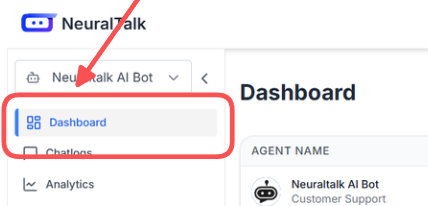
- Access the Dashboard
- Log in to neuraltalk.ai
- Click “Create New Assistant” or the ”+” button
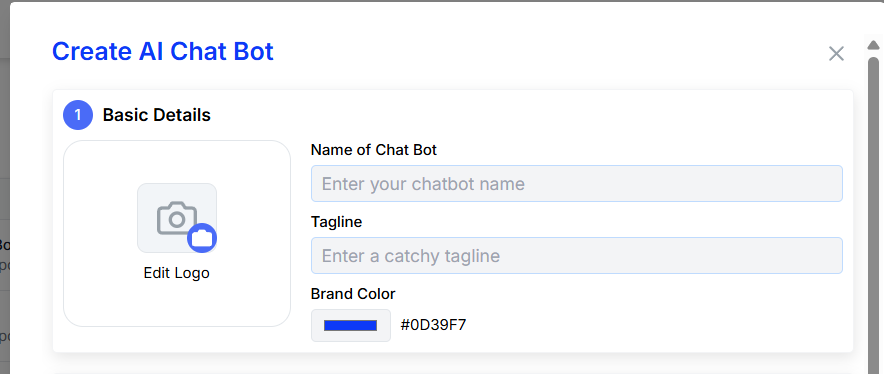
- Basic Information
- Assistant Name: Choose a descriptive name (e.g., “Acme Customer Support”)
- Description: Brief description of your assistant’s purpose
- Category: Select the primary use case (Support, Sales, General, etc.)
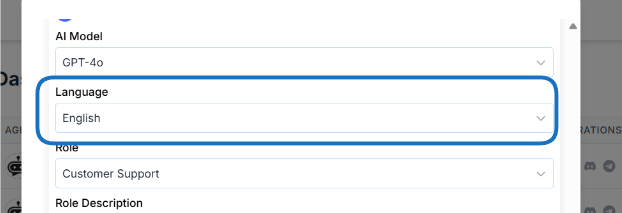
- Language Configuration
- Primary Language: Select the main language for conversations
- Additional Languages: Add support for multiple languages if needed
- Regional Settings: Configure date, time, and number formats
Step 2: Personality Configuration
Tone and Style
Tone and Style
Choose how your assistant should communicate:
- Professional: Formal, business-appropriate language
- Friendly: Warm, approachable, and conversational
- Casual: Relaxed, informal communication style
- Custom: Define your own personality traits
Response Length
Response Length
Configure how detailed responses should be:
- Concise: Short, direct answers
- Detailed: Comprehensive, thorough responses
- Adaptive: Adjusts based on question complexity
Conversation Style
Conversation Style
Set the interaction pattern:
- Question-Answer: Direct responses to specific questions
- Conversational: Engages in back-and-forth dialogue
- Guided: Leads users through structured flows
Advanced Configuration
Greeting and Fallback Messages
-
Welcome Message
-
Fallback Messages
- Configure what to say when the AI doesn’t understand
- Set up escalation to human agents
- Define when to ask for clarification
-
Conversation Starters
- Add suggested questions or topics
- Help users understand what they can ask
- Guide new users to common use cases
Knowledge Base Setup
Upload Documents
Add your existing content:
- PDF files (manuals, guides, policies)
- Word documents (FAQs, procedures)
- Text files (knowledge articles)
- Web pages (via URL)
Manual Content Entry
Add specific information:
- Frequently asked questions
- Product specifications
- Company policies
- Contact information
AI Model Configuration
Model Selection
Choose the AI model that best fits your needs:
- GPT-4: Most capable, best for complex tasks
- GPT-3.5: Fast and cost-effective
- Claude: Excellent for analysis and reasoning
Custom Instructions
Provide specific instructions for your assistant:
- Response format preferences
- Brand voice guidelines
- Specific behaviors to avoid
Integration Settings
Website Widget Configuration
-
Visual Customization
- Choose widget position and size
- Match your brand colors
- Upload your logo
- Select animation preferences
-
Behavior Settings
- Set when the widget appears
- Configure auto-open triggers
- Set conversation persistence
- Enable typing indicators
Platform-Specific Settings
WhatsApp Integration
WhatsApp Integration
- Configure business profile
- Set up message templates
- Configure webhook endpoints
- Test message delivery
Slack Integration
Slack Integration
- Set up bot permissions
- Configure slash commands
- Set up channel monitoring
- Configure user authentication
API Integration
API Integration
- Generate API keys
- Configure webhooks
- Set up authentication
- Test API endpoints
Testing and Validation
Pre-Launch Testing
-
Conversation Testing
- Test common questions
- Try edge cases and unusual inputs
- Verify response accuracy
- Check conversation flow
-
Integration Testing
- Test on all target platforms
- Verify message delivery
- Check error handling
- Test user authentication
-
Performance Testing
- Monitor response times
- Test under load
- Verify scalability
- Check resource usage
Quality Assurance
Content Review
- Verify all information is accurate
- Check for outdated content
- Ensure brand consistency
- Validate contact information
User Experience Testing
- Test from user perspective
- Check mobile responsiveness
- Verify accessibility features
- Test different browsers
Launch Checklist
Before going live, ensure you’ve completed:- Assistant name and description configured
- Personality and tone settings applied
- Knowledge base populated and organized
- Greeting and fallback messages set
- Visual styling matches brand guidelines
- All integrations tested and working
- Analytics and tracking configured
- Team trained on monitoring and management
- Support processes defined
- Backup and recovery procedures in place
Post-Launch Monitoring
Key Metrics to Track
Engagement
- Conversation volume
- User satisfaction scores
- Response completion rates
- Time to resolution
Performance
- Response accuracy
- Escalation rates
- Error rates
- System uptime
Continuous Improvement
-
Regular Reviews
- Weekly conversation analysis
- Monthly performance reports
- Quarterly strategy reviews
- Annual platform updates
-
Content Updates
- Add new FAQs based on user questions
- Update product information
- Refresh policies and procedures
- Remove outdated content
-
Feature Enhancements
- Add new integrations
- Implement advanced features
- Optimize conversation flows
- Enhance user experience
Troubleshooting Common Issues
Assistant Not Responding
Assistant Not Responding
- Check API key configuration
- Verify model selection
- Review rate limits
- Check network connectivity
Inaccurate Responses
Inaccurate Responses
- Review knowledge base content
- Check training data quality
- Adjust model parameters
- Add more specific examples
Integration Problems
Integration Problems
- Verify webhook URLs
- Check authentication tokens
- Review platform permissions
- Test API endpoints
Next Steps
Now that your assistant is set up, explore these advanced features:Training Your Assistant
Learn how to effectively train your AI with your knowledge base
Website Integration
Add your assistant to your website with our easy integration
Styling & Customization
Customize the appearance and behavior of your assistant
Advanced Tools
Add powerful tools and workflows to extend capabilities