Overview
The Plugin & Design feature allows you to install and customize your chatbot on your website or platform. You can integrate it as a popup widget, iframe, or use platform-specific instructions for Webflow, Wix, Framer, WordPress, and Shopify. This guide explains installation, embedding, and design best practices.Accessing Plugin & Design settings
Open the Dashboard
- Log in to your NeuralTalk AI dashboard
- Select the chatbot you want to connect
- Navigate to Addons and Design from the main menu
- Click on Plugin & Design
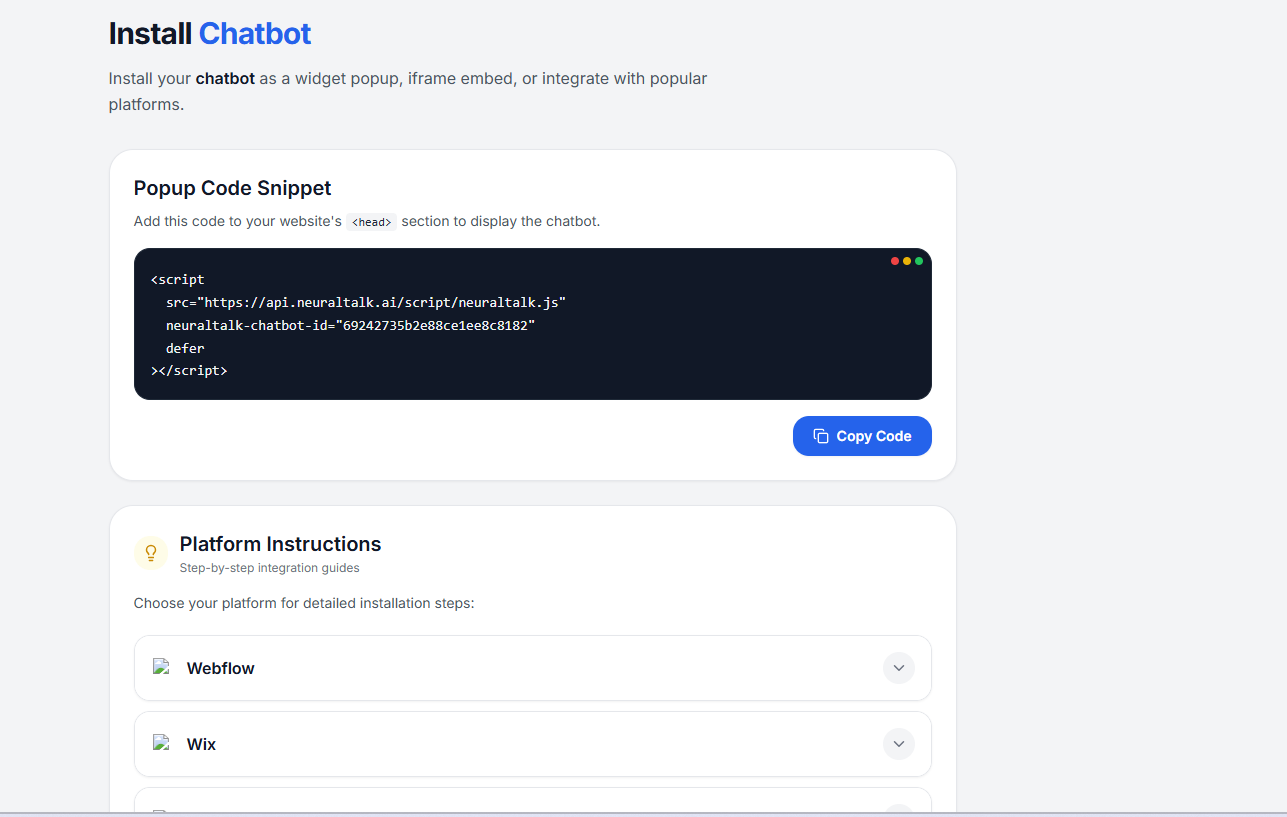
Install Chatbot
Add Popup Code Snippet
- Copy the following code snippet
- Paste it inside your website’s
<head>section
Platform Integrations
The following platform integrations are available:- Webflow
- Wix
- Framer
- WordPress
- Shopify
- HubSpot
- Zendesk
Best Practices
- Ensure the chatbot is visible but non-intrusive
- Test on desktop and mobile for responsiveness
- Match chatbot theme and colors to your website design
- Follow platform-specific steps for optimal integration