Create a Bot with Basic Details
Follow these steps to create your first NeuralTalk AI chatbot. Each step includes a helpful screenshot for clarity.
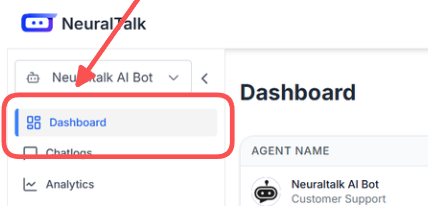
Step 1: Go to the Dashboard
Navigate to your NeuralTalk dashboard.
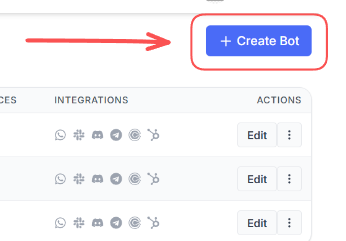
Step 2: Click "Create Bot"
On the dashboard, click the + Create Bot button to start the bot creation process.
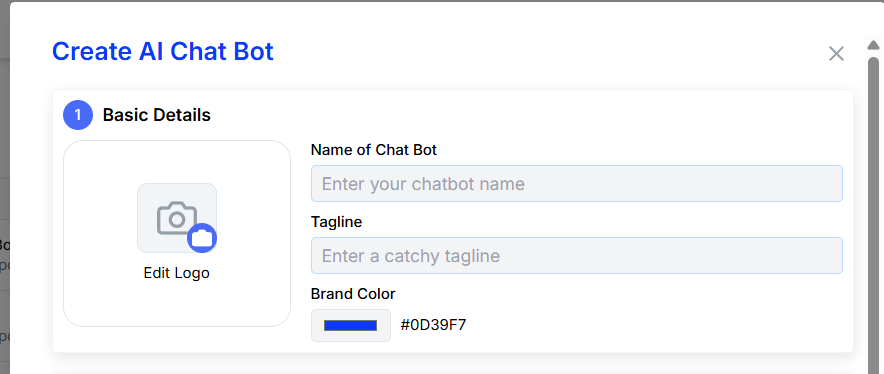
Step 3: Enter Basic Bot Details
Fill in the required details for your new bot:
- Bot Name: Choose a unique and descriptive name.
- Tag Name: Assign a tag for easy identification.
- Bot Color: Pick a color to represent your bot.
- Bot Image: Upload an image or avatar for your bot.
Step 4: Configure Data Source
Choose how your bot will get its knowledge. You can select from:
- URL: Enter a website URL to crawl.
- Document and Images: Upload files for the bot to learn from.
- Google Drive: Connect your Google Drive for document access.

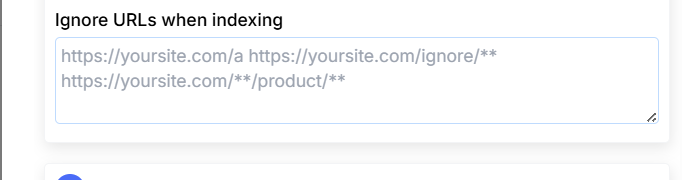
Step 5: Configure URL Exclusions (Optional)
If you're using URL as your data source, you can specify which URLs to ignore during the indexing process:
- Ignore URLs when indexing: Add specific URL patterns that should be excluded from crawling
- Use wildcard patterns like
https://yoursite.com/ignore/**to exclude entire sections - This helps focus your bot's knowledge on relevant content only
- Examples of URLs to ignore:
- Admin pages:
https://yoursite.com/admin/** - Product pages:
https://yoursite.com/**/product/** - Private sections:
https://yoursite.com/private/**
- Admin pages:
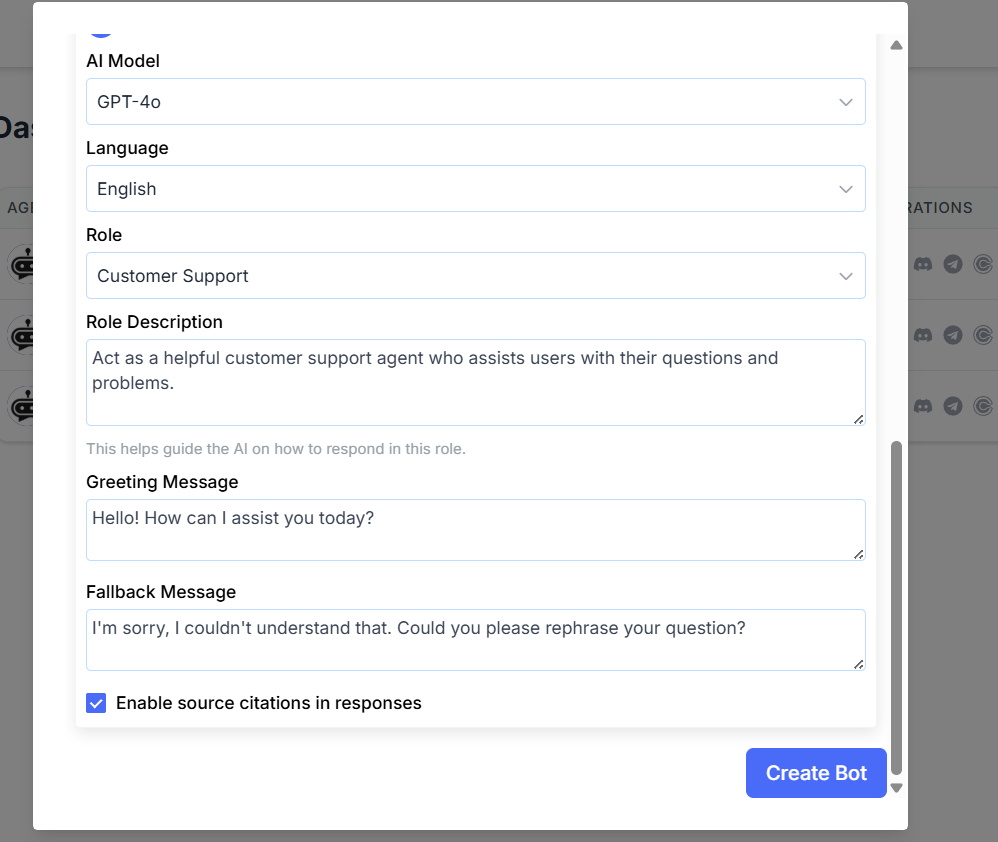
Step 6: Configure AI Model and Settings
Set up your bot's AI capabilities and behavior:
AI Model Selection
Choose from various AI models based on your needs:
- GPT-4o: Most advanced model with superior reasoning
- GPT-4o Mini: Faster and cost-effective option
- GPT-3.5 Turbo: Reliable and efficient for most use cases
- GPT-4: Advanced model with enhanced capabilities
Language Selection
Select your bot's primary language:
- English
- Spanish
- German
- Japanese
- Chinese
- And many more languages available
Role and Description
- Role: Define your bot's purpose (e.g., Customer Support, Sales Assistant)
- Role Description: Provide detailed instructions on how your bot should behave and respond
Greeting Message
Set a welcoming first message that users will see when they start a conversation:
- Example: "Hello! How can I assist you today?"
Fallback Message
Configure what your bot says when it doesn't understand a question:
- Example: "I'm sorry, I couldn't understand that. Could you please rephrase your question?"
Additional Options
- Enable source citations in responses: Check this to show sources in bot responses
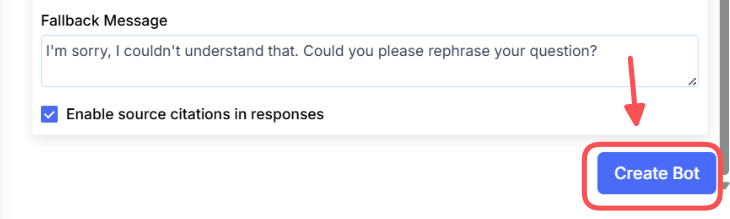
Step 7: Create Your Bot
After configuring all settings, click the Create Bot button to finalize your bot creation.
Here you can create your bot with all the configured settings. Your bot will be ready to use once created!
Summary
You've now created a NeuralTalk AI bot with comprehensive details including:
- Basic information (name, tag, color, image)
- Data source configuration
- URL exclusion settings (if applicable)
- AI model selection
- Language preferences
- Custom greeting and fallback messages
- Role and behavior settings
Your bot is now ready to assist users with their questions and provide intelligent responses based on your configured knowledge base.
Need help?
Contact our support team at [email protected].