Add Chatbot to Your Website
Learn how to integrate your NeuralTalk AI chatbot into your website with our simple step-by-step guide.
Step-by-Step Integration Guide
Step 1: Login and Access Your Dashboard
- Login to NeuralTalk AI: Go to neuraltalk.ai and sign in with your credentials
- Access Dashboard: Once logged in, you'll be redirected to your main dashboard where you can see all your chatbots
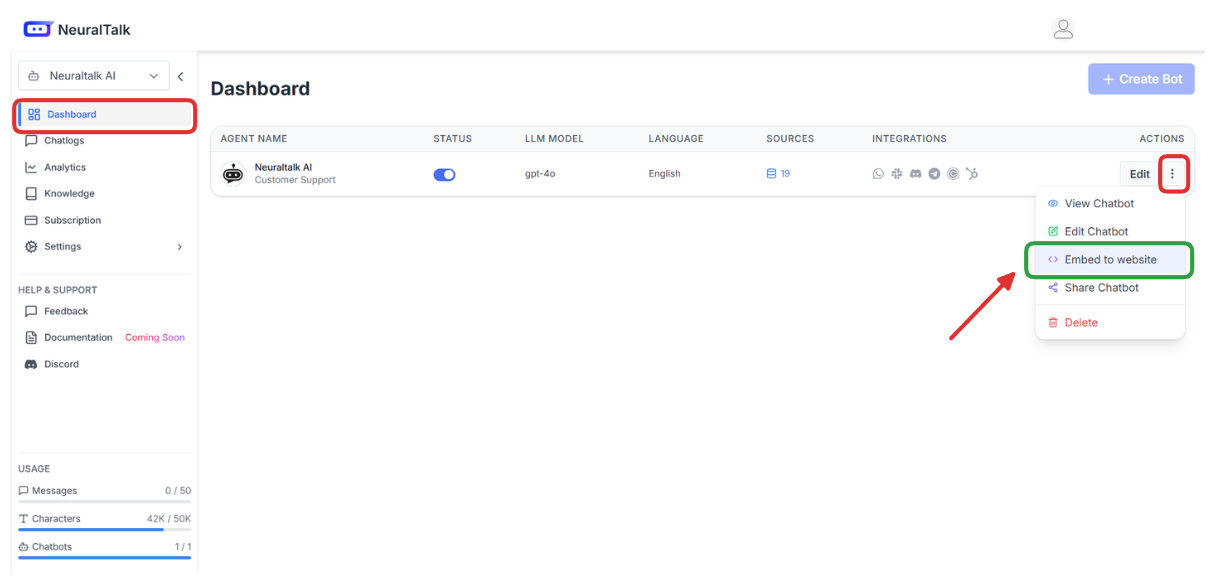
Step 2: Access Chatbot Embed Settings
- Locate Your Chatbot: Find the chatbot you want to embed from the list in your dashboard
- Click Actions Menu: Click on the three dots (⋮) in the Actions column for your desired chatbot
- Select "Embed to website": Choose the "Embed to website" option from the dropdown menu
Step 3: Configure Your Chatbot Settings
Configure how your chatbot will appear and behave on your website.

Configuration Options:
Widget Size & Button Size
- Widget Size: Normal, Small, or Large
- Widget Button Size: Normal, Small, or Large
Positioning
- Desktop Offset Bottom: Distance from bottom of screen (in pixels)
- Desktop Offset Right: Distance from right side of screen (in pixels)
- Mobile Offset Bottom: Distance from bottom on mobile devices (in pixels)
- Mobile Offset Right: Distance from right side on mobile devices (in pixels)
Widget Display
- Entire Site: Show chatbot on all pages of your website
- Hide for URLs: Hide chatbot on specific URLs
- Show for URLs: Only show chatbot on specific URLs
Device Visibility
- Both: Display on both desktop and mobile devices
- Desktop Only: Only show on desktop devices
- Mobile Only: Only show on mobile devices
Placement
- Right: Position chatbot on the right side (default)
- Left: Position chatbot on the left side
Additional Options
- Allow widget to be movable: Users can drag the chatbot to a different position
- Initially open widget on desktop: Automatically open the chat window when page loads
Step 4: Preview Your Chatbot
Preview how your chatbot will look and function before embedding it on your website.
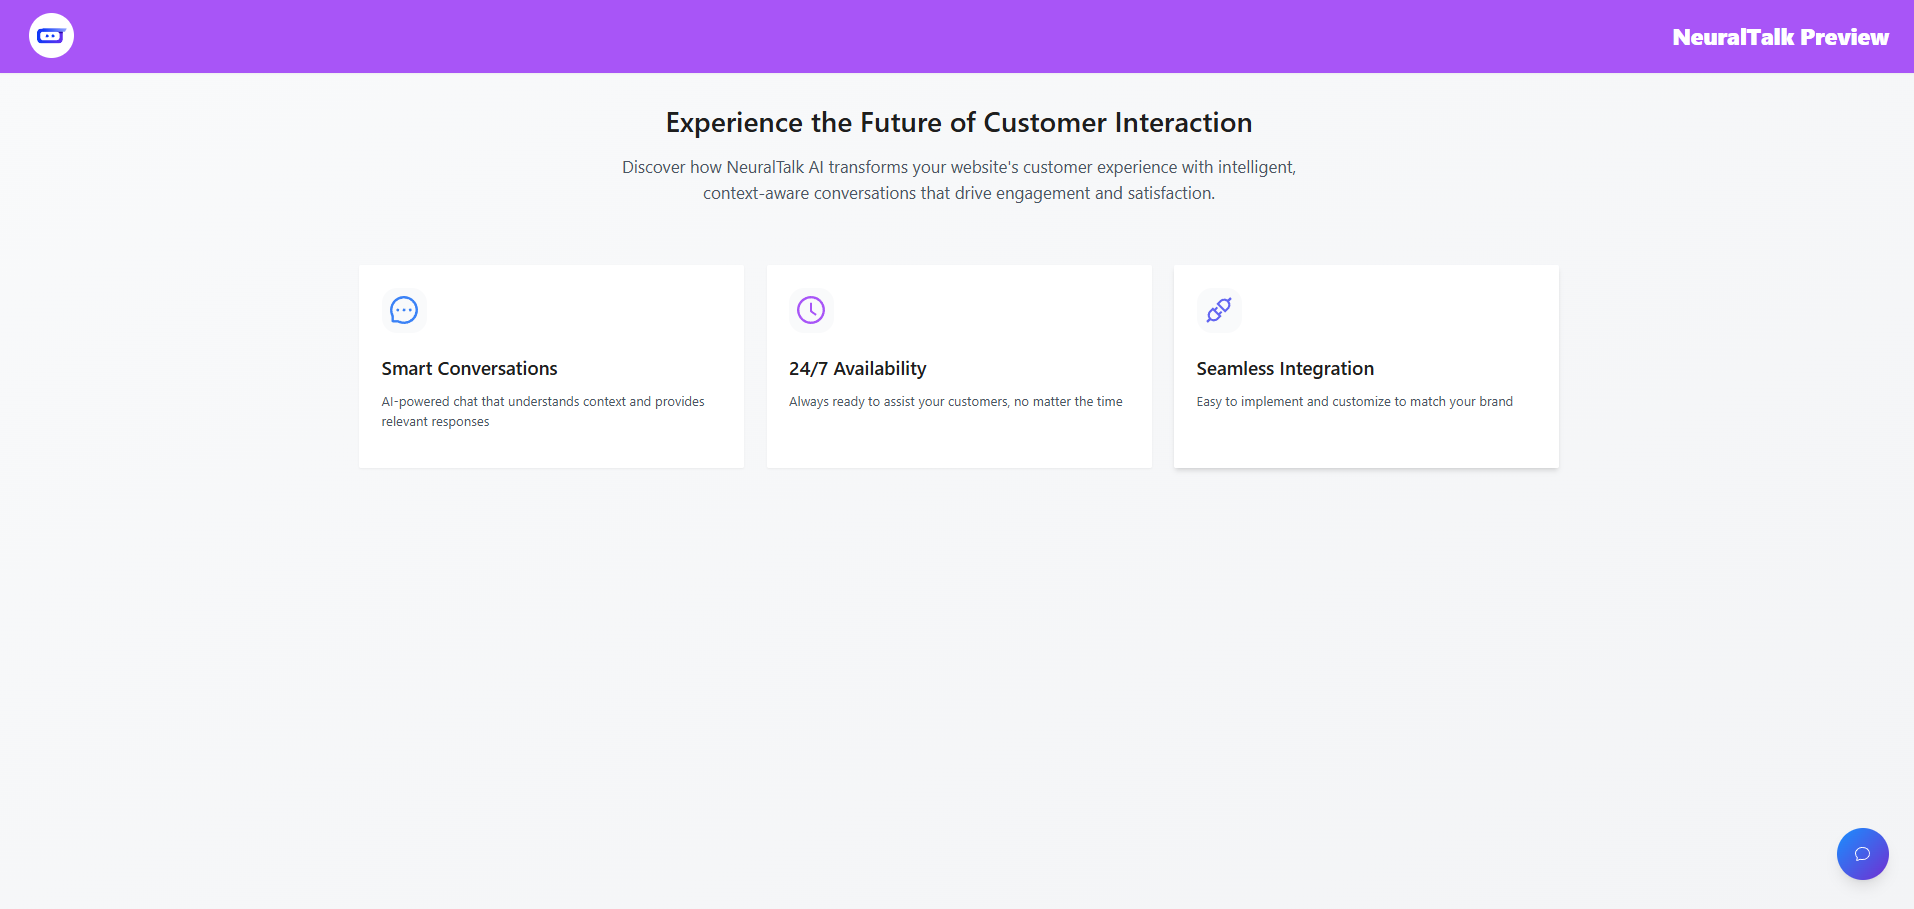
The preview shows the key features of your NeuralTalk AI chatbot:
- Smart Conversations: AI-powered chat with intelligent responses
- 24/7 Availability: Always ready to assist your customers
- Seamless Integration: Easy to implement and customize
Step 5: Copy Embed Code
Once you're satisfied with your configuration, get the embed code to add to your website.
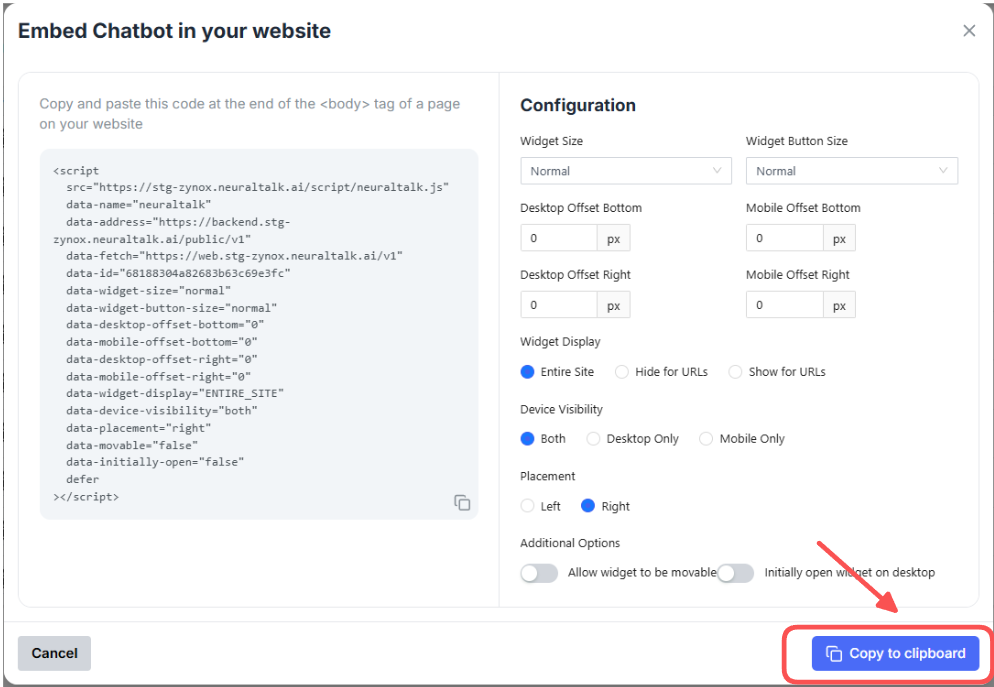
- Click "Copy to clipboard": Click the blue "Copy to clipboard" button
- Paste the code: Add the code to your website before the closing
</body>tag
Your embed code will look like this:
<script
  src="https://stg-zynox.neuraltalk.ai/script/neuraltalk.js"
  data-name="neuraltalk"
  data-address="https://backend.stg-zynox.neuraltalk.ai/public/v1"
  data-fetch="https://web.stg-zynox.neuraltalk.ai/v1"
  data-id="68188304a82683b63c69e3fc"
  data-widget-size="normal"
  data-widget-button-size="normal"
  data-desktop-offset-bottom="0"
  data-mobile-offset-bottom="0"
  data-desktop-offset-right="0"
  data-mobile-offset-right="0"
  data-widget-display="ENTIRE_SITE"
  data-device-visibility="both"
  data-placement="right"
  data-movable="false"
  data-initially-open="false"
  defer
></script>
How to Add to Your Website
HTML Website
Paste the embed code before the closing </body> tag:
<!DOCTYPE html>
<html>
<head>
    <title>Your Website</title>
</head>
<body>
    <!-- Your website content -->

    <!-- Paste your embed code here -->
    <script src="https://stg-zynox.neuraltalk.ai/script/neuraltalk.js" ...></script>
</body>
</html>
WordPress
- Install "Insert Headers and Footers" plugin
- Go to Settings → Insert Headers and Footers
- Paste your embed code in the "Scripts in Footer" section
- Save changes
Testing
After adding the code to your website:
- Check that the chatbot appears on your website
- Test opening and closing the chat window
- Send a test message to verify it works
- Check on both desktop and mobile devices
Congratulations! Your NeuralTalk AI chatbot is now integrated into your website.