> ## Documentation Index
> Fetch the complete documentation index at: https://docs.neuraltalk.ai/llms.txt
> Use this file to discover all available pages before exploring further.

# 🎯 Getting Started

> Complete guide to setting up your first AI assistant with NeuralTalk

🎥 Refer to the setup video for a step-by-step visual guide:

<div
  style={{
position: "relative",
paddingBottom: "56.25%", // 16:9 aspect ratio
height: 0,
marginTop: "16px",
borderRadius: "14px",
overflow: "hidden",
}}
>
  <iframe
    src="https://www.youtube.com/embed/C253FJtObPc?si=g77g1XIYqC8Jk3Mb"
    title="Set up Video"
    frameBorder="0"
    allow="accelerometer; autoplay; clipboard-write; encrypted-media; gyroscope; picture-in-picture; web-share"
    allowFullScreen
    style={{
  position: "absolute",
  top: 0,
  left: 0,
  width: "100%",
  height: "100%",
  borderRadius: "14px",
}}
  />
</div>

## Prerequisites

Before you begin, make sure you have:

* A NeuralTalk account ([Sign up here](https://neuraltalk.ai))
* Your business information and content ready for training
* A website or platform where you want to deploy your assistant

## Step 1: Create Your Account

1. Visit [neuraltalk.ai](https://neuraltalk.ai)
2. Click "Sign Up" and create your account
3. Verify your email address
4. Complete your profile setup

<img className="rounded-lg shadow-lg mb-6" src="https://mintcdn.com/neuraltalk/SRNEarpkm3ABbt28/images/goToTheDashboard.png?fit=max&auto=format&n=SRNEarpkm3ABbt28&q=85&s=875e820f2c0665473cb1a2c496d0352c" alt="NeuralTalk Dashboard - Account Creation" width="428" height="206" data-path="images/goToTheDashboard.png" />

<Note>
  You can start with our free plan, which includes **1,000 conversations** per month and basic features.
  It also comes with **1M training characters**.
</Note>

## Step 2: Create Your First Assistant

1. **Navigate to the Dashboard**
   * Once logged in, you'll see the main dashboard
   * Click "Create New Assistant" to begin

<img className="rounded-lg shadow-lg mb-6" src="https://mintcdn.com/neuraltalk/SRNEarpkm3ABbt28/images/createBotBasicDetails.png?fit=max&auto=format&n=SRNEarpkm3ABbt28&q=85&s=1c94c8d68f5cc5a5bfef2d85cebc62cb" alt="Create Assistant - Basic Details" width="884" height="374" data-path="images/createBotBasicDetails.png" />

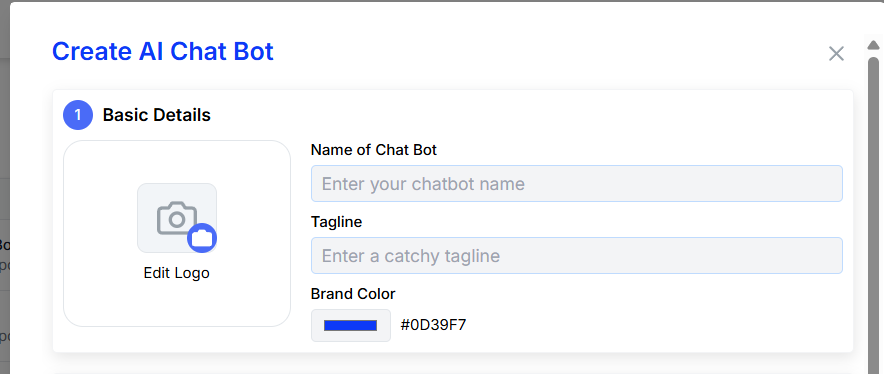
2. **Basic Information**
   * **Assistant Name**: Choose a name that represents your business (e.g., "Acme Support Bot")
   * **Description**: Briefly describe what your assistant will help with
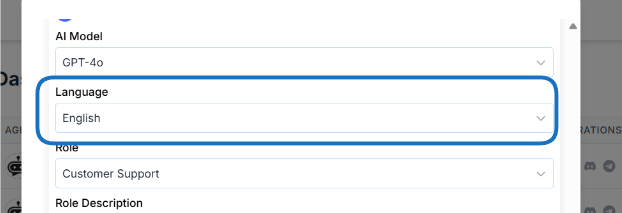
   * **Language**: Select the primary language for your assistant

<img className="rounded-lg shadow-lg mb-6" src="https://mintcdn.com/neuraltalk/SRNEarpkm3ABbt28/images/LanguageImage.png?fit=max&auto=format&n=SRNEarpkm3ABbt28&q=85&s=1d1b13fd3a772adb969707aef2d30071" alt="Language Selection" width="622" height="213" data-path="images/LanguageImage.png" />

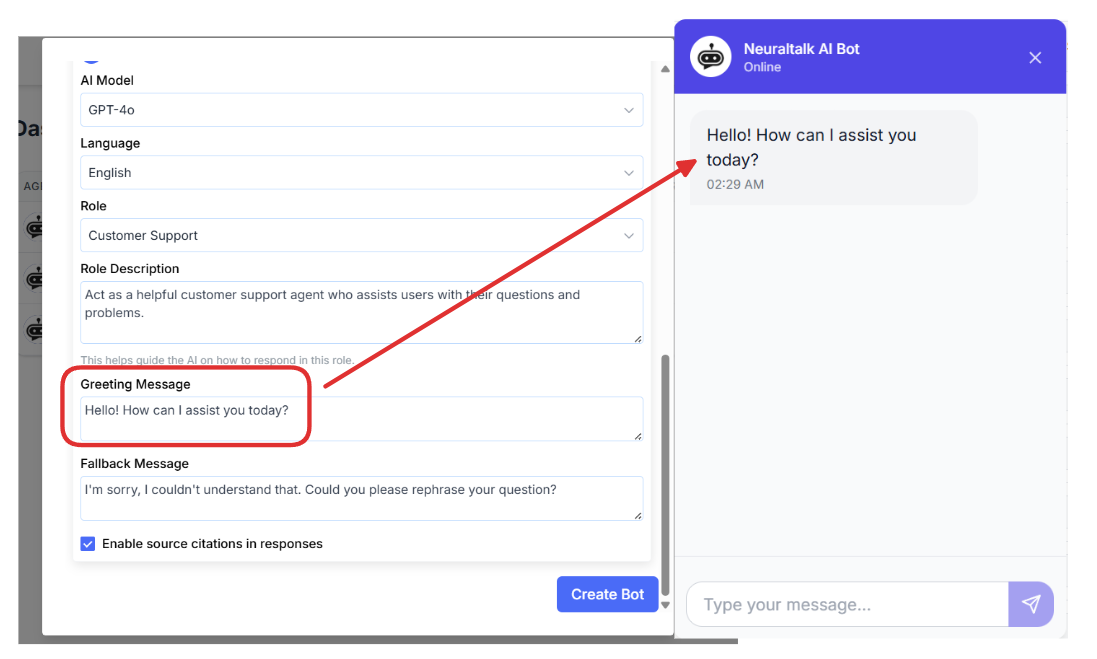
3. **Personality & Behavior**
   * **Tone**: Choose between Professional, Friendly, or Casual
   * **Response Style**: Select how detailed you want responses to be
   * **Greeting Message**: Customize the first message users will see

<img className="rounded-lg shadow-lg mb-6" src="https://mintcdn.com/neuraltalk/SRNEarpkm3ABbt28/images/greetingMessage.png?fit=max&auto=format&n=SRNEarpkm3ABbt28&q=85&s=b755cabd577c02125446ae4e52212a08" alt="Greeting Message Configuration" width="1097" height="659" data-path="images/greetingMessage.png" />

<Card title="Pro Tip" icon="lightbulb">
  Keep your assistant's personality consistent with your brand voice. This helps create a cohesive customer experience.
</Card>

## Step 3: Train Your Assistant

Training is crucial for creating an effective AI assistant. Here's how to do it:

<img className="rounded-lg shadow-lg mb-6" src="https://mintcdn.com/neuraltalk/SRNEarpkm3ABbt28/images/knowledgeImage1.png?fit=max&auto=format&n=SRNEarpkm3ABbt28&q=85&s=fe54f6d598571c088d9387d804c2f675" alt="Knowledge Base Training Interface" width="1382" height="660" data-path="images/knowledgeImage1.png" />

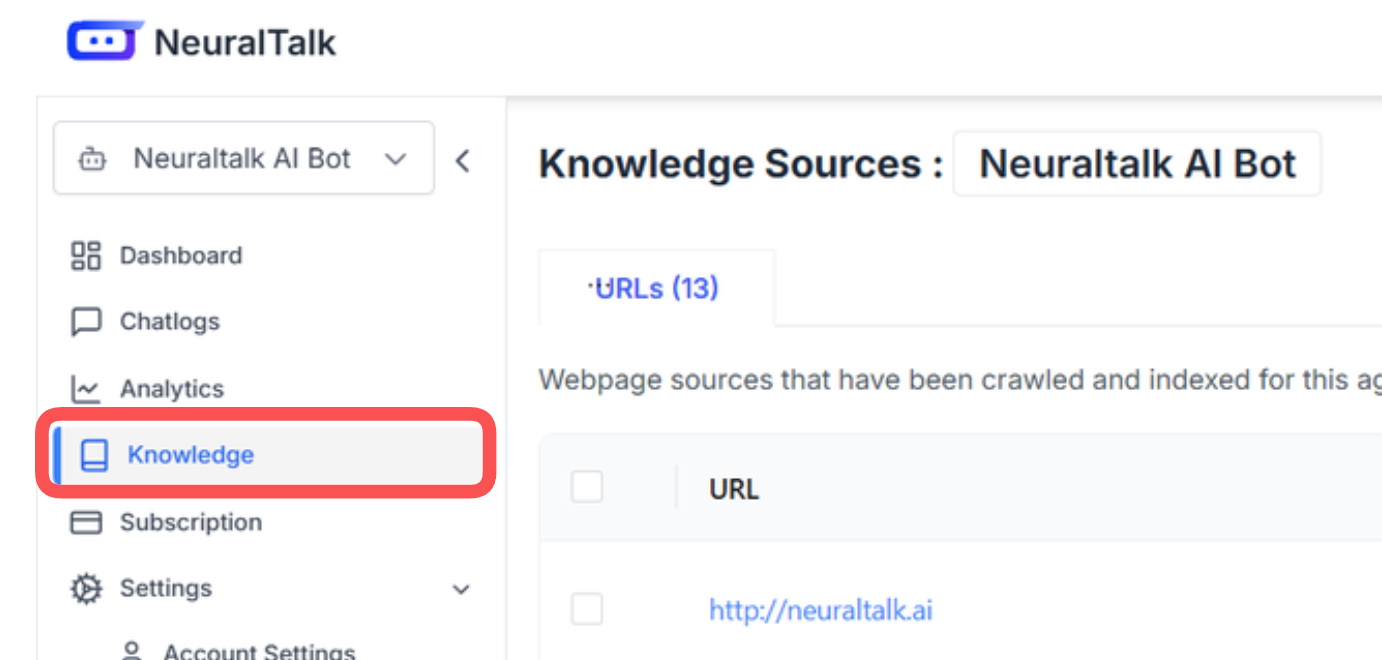
### Upload Your Knowledge Base

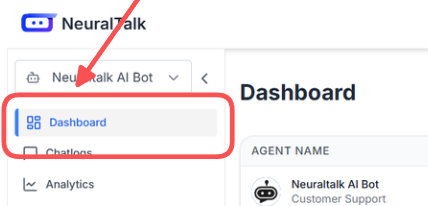
1. **Navigate to Training**
   * Go to the "Knowledge Base" section in your assistant settings
   * Click "Add Content" to upload your documents

<img className="rounded-lg shadow-lg mb-6" src="https://mintcdn.com/neuraltalk/SRNEarpkm3ABbt28/images/knowlegde3.png?fit=max&auto=format&n=SRNEarpkm3ABbt28&q=85&s=e438d464ae3ffdf035733e1d1e34d57d" alt="Add Content to Knowledge Base" width="785" height="426" data-path="images/knowlegde3.png" />

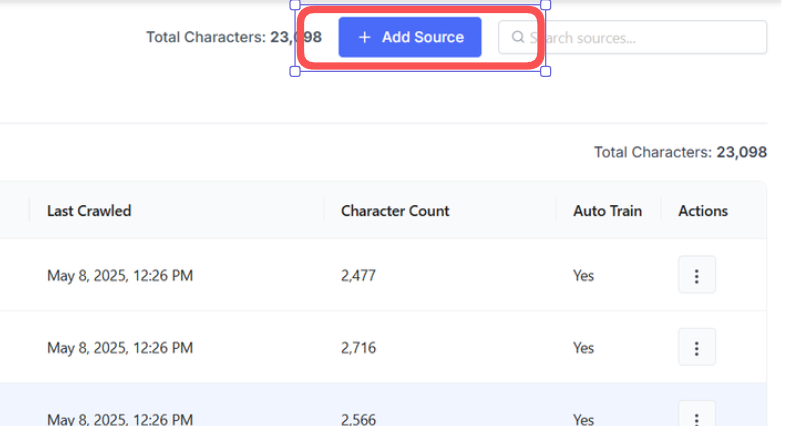
2. **Supported File Types**
   * PDF documents
   * Word documents (.docx)
   * Text files (.txt)
   * CSV files
   * Web pages (via URL)

3. **Manual Content Entry**
   * Add frequently asked questions
   * Include product information
   * Add company policies and procedures
   * Include contact information and hours

### Content Best Practices

<AccordionGroup>
  <Accordion title="Organize Your Content">
    Structure your content logically with clear headings and sections. This helps the AI understand context better.
  </Accordion>

  <Accordion title="Include Examples">
    Provide specific examples of questions and answers. This helps the AI learn your preferred response style.
  </Accordion>

  <Accordion title="Keep It Current">
    Regularly update your knowledge base with new information, product updates, and policy changes.
  </Accordion>

  <Accordion title="Test and Refine">
    Review conversations and add content based on questions your assistant couldn't answer well.
  </Accordion>
</AccordionGroup>

## Step 4: Customize Appearance

Make your assistant match your brand:

1. **Visual Styling**
   * Choose colors that match your brand
   * Upload your logo
   * Select a chat widget style

2. **Conversation Settings**
   * Set response length preferences
   * Configure fallback messages
   * Set up human handover triggers

3. **Advanced Features**
   * Enable typing indicators
   * Add suggested responses
   * Configure conversation starters

## Step 5: Deploy Your Assistant

<img className="rounded-lg shadow-lg mb-6" src="https://mintcdn.com/neuraltalk/SRNEarpkm3ABbt28/images/featureimage2.png?fit=max&auto=format&n=SRNEarpkm3ABbt28&q=85&s=340eaa56a0e409087aab30bfaf6b962d" alt="Deploy Assistant - Integration Options" width="1896" height="903" data-path="images/featureimage2.png" />

### Website Integration

1. **Get Your Code**
   * Go to the "Deploy" section
   * Copy the provided JavaScript code snippet

2. **Add to Your Website**
   * Paste the code before the closing `</body>` tag
   * Save and publish your website

3. **Test the Integration**
   * Visit your website
   * Look for the chat widget
   * Test a conversation

### Other Platforms

<Columns cols={2}>
  <Card title="WhatsApp" icon="whatsapp" href="/integrations/whatsapp">
    Connect to WhatsApp Business API for customer support
  </Card>

  <Card title="Slack" icon="slack" href="/integrations/slack">
    Deploy in your Slack workspace for team support
  </Card>

  <Card title="Discord" icon="discord" href="/integrations/discord">
    Add to your Discord server for community support
  </Card>

  <Card title="Custom API" icon="code" href="/integrations/custom-api">
    Build custom integrations with our API
  </Card>
</Columns>

## Step 6: Monitor and Optimize

<img className="rounded-lg shadow-lg mb-6" src="https://mintcdn.com/neuraltalk/SRNEarpkm3ABbt28/images/chatlogimage.png?fit=max&auto=format&n=SRNEarpkm3ABbt28&q=85&s=ea7227a30645039326b9221a8b4786e7" alt="Analytics Dashboard - Monitor Conversations" width="1918" height="835" data-path="images/chatlogimage.png" />

### Review Conversations

1. **Check the Analytics Dashboard**
   * View conversation metrics
   * Identify common questions
   * Monitor user satisfaction

2. **Improve Responses**
   * Add content for unanswered questions
   * Refine existing answers
   * Update outdated information

3. **Test Regularly**
   * Try different question phrasings
   * Test edge cases
   * Verify accuracy of responses

## Next Steps

Congratulations! You've successfully created your first AI assistant. Here's what to do next:

<CardGroup cols={2}>
  <Card title="Advanced Setup" icon="cogs" href="/setup/assistant-tools">
    Learn about advanced features like tools and workflows
  </Card>

  <Card title="Styling Guide" icon="palette" href="/setup/styling-assistant">
    Customize your assistant's appearance and behavior
  </Card>

  <Card title="Integration Guides" icon="plug" href="/integrations/slack">
    Connect to more platforms and services
  </Card>

  <Card title="API Documentation" icon="code" href="/api-reference/introduction">
    Build custom integrations with our API
  </Card>
</CardGroup>

## Need Help?

If you run into any issues or have questions:

* **Documentation**: Browse our comprehensive guides
* **Support**: Contact us at [support@neuraltalk.ai](mailto:support@neuraltalk.ai)
* **Community**: Join our [Discord community](https://discord.gg/tHpggadDAk)
* **Video Tutorials**: Check out our [tutorial videos](https://youtu.be/uClV5GfzDEY?si=Fpw6nHyYTmddyFqk)

<Note>
  **Pro Tip**: Start simple and gradually add more features as you become comfortable with the platform. You can always enhance your assistant later!
</Note>
